Setting Up Dialer
Providing dialer access
To use the dialer, every team member — including admins — must first be given access. Follow the steps below:
-
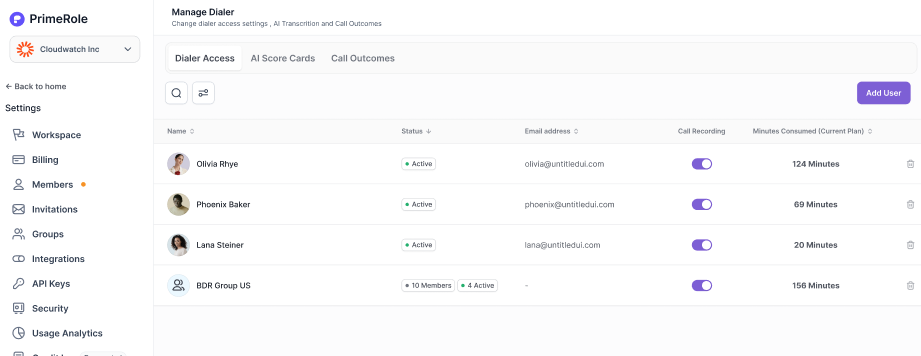
Go to Settings → Dialer & AI
- Find the Dialer Access section.
-
Click on "Add User"
- Select the team member you want to give access to.
-
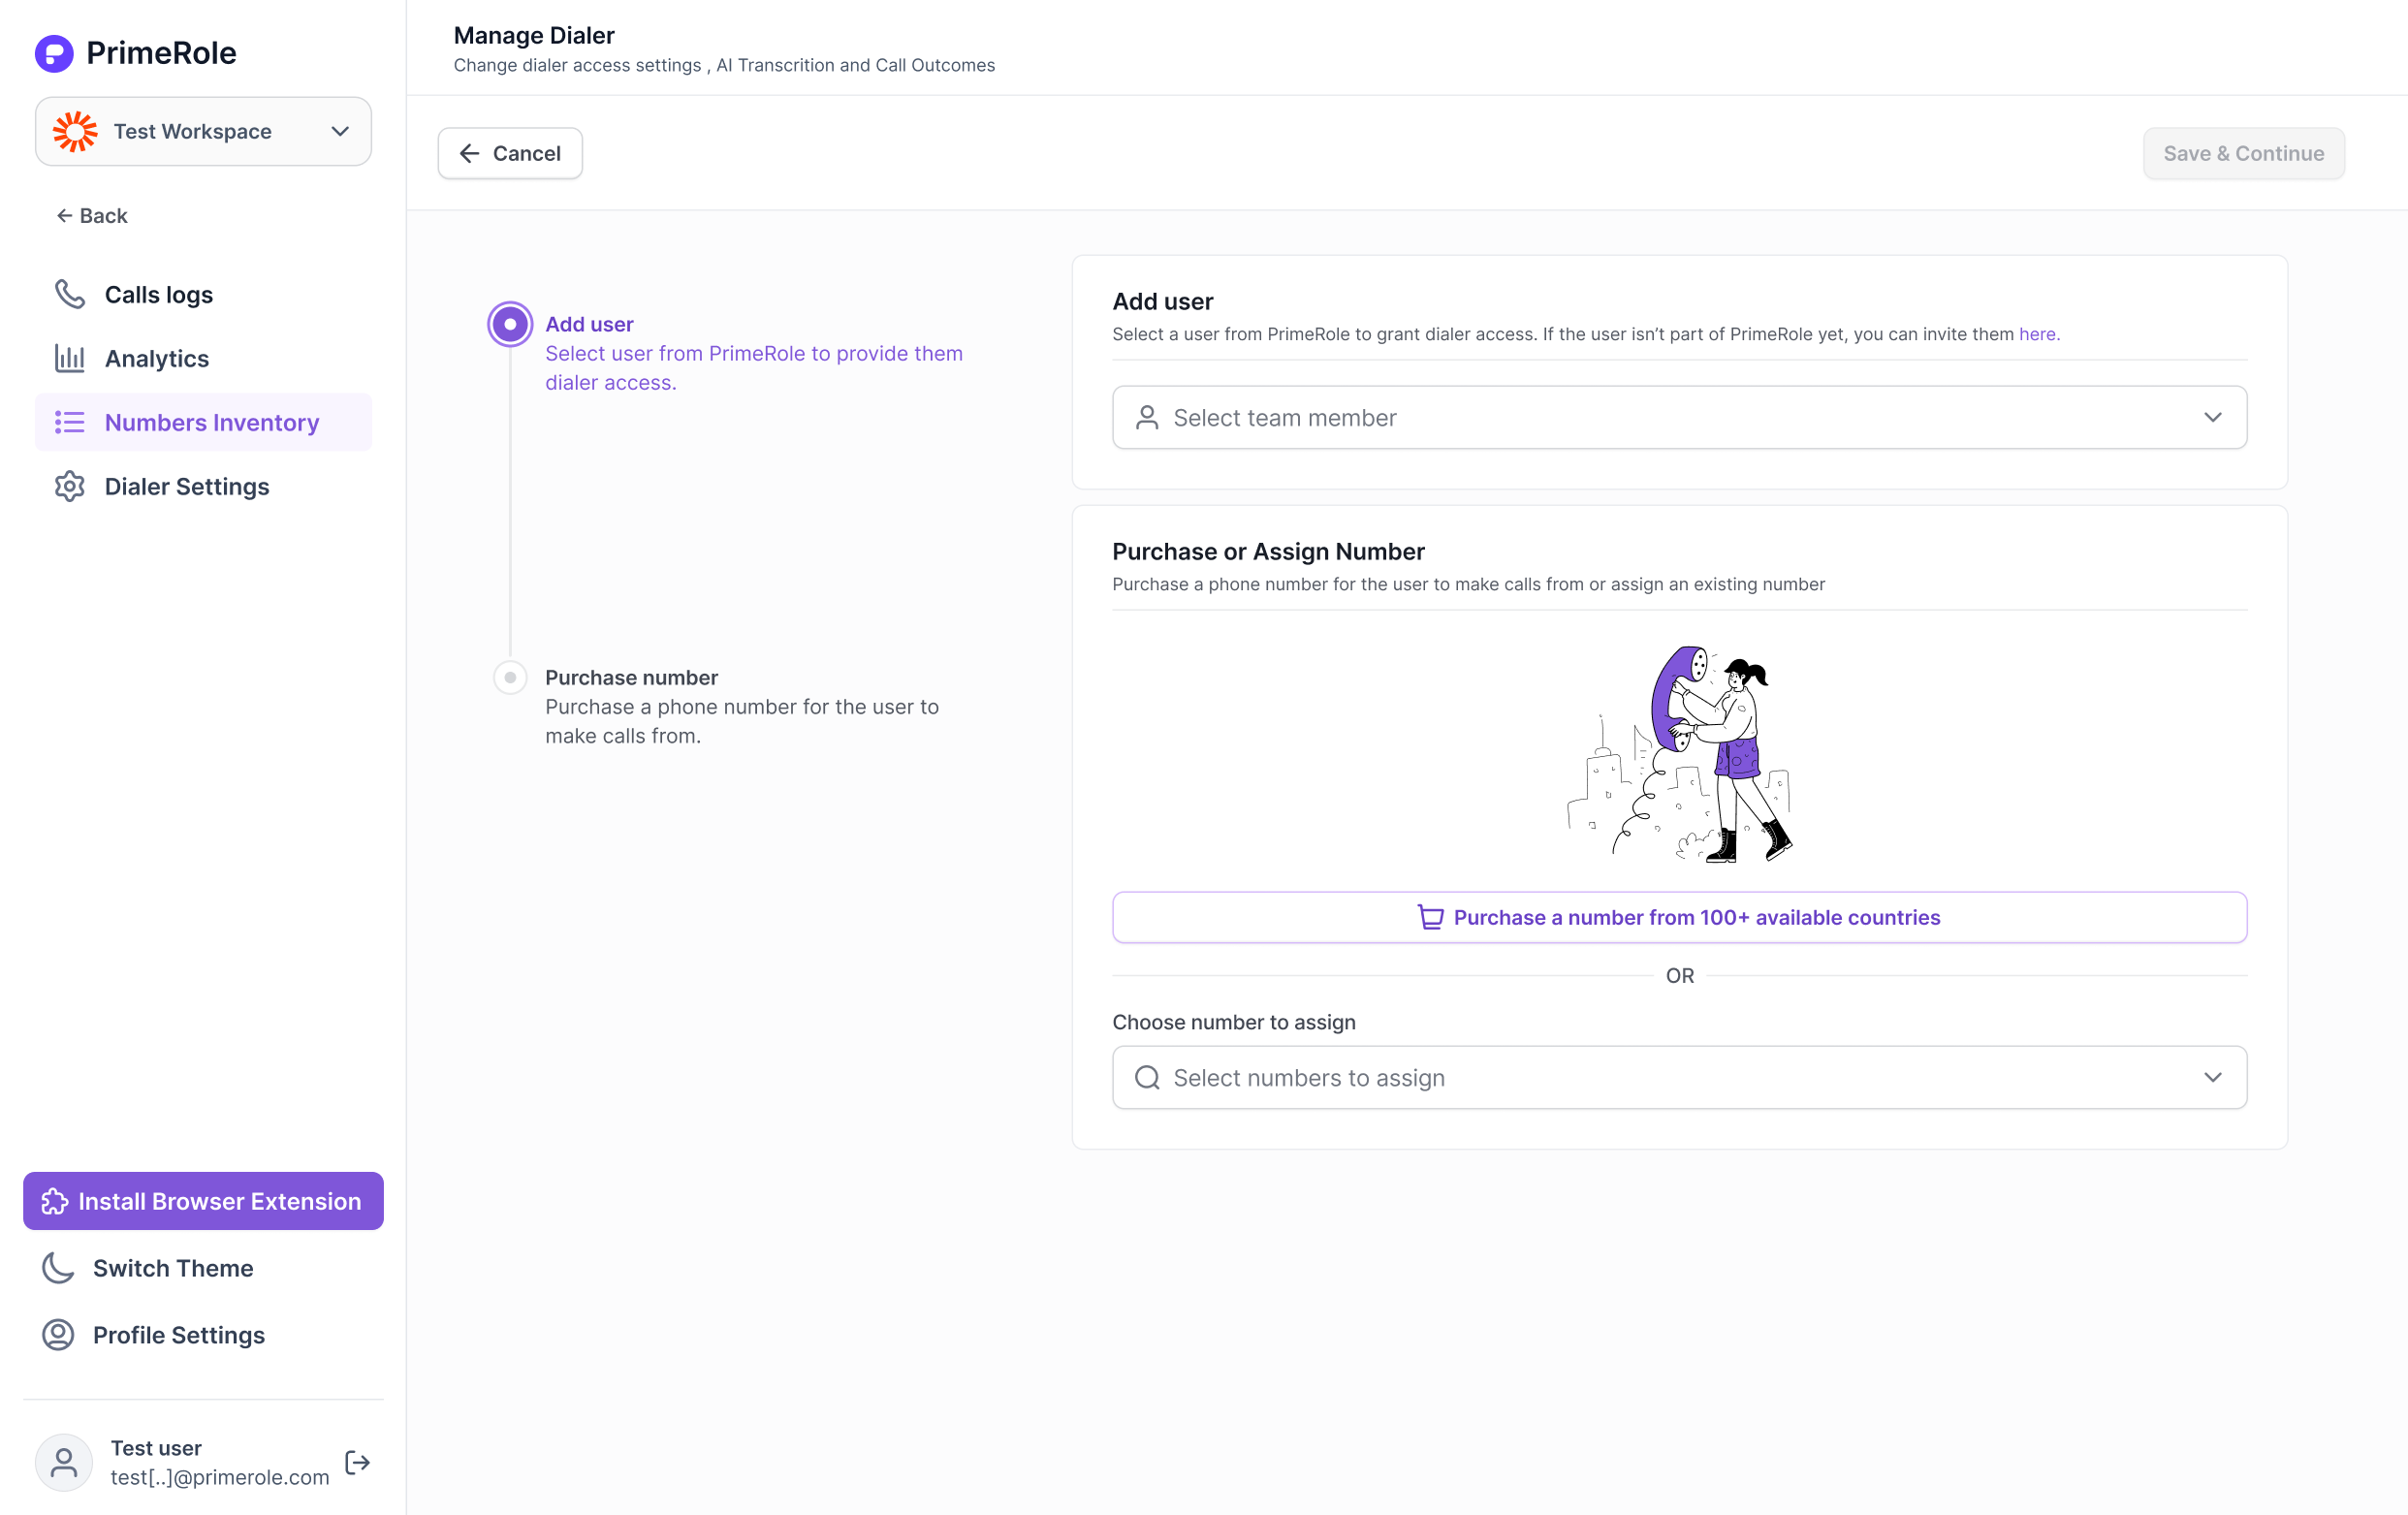
Choose or Purchase a Number
- If you already own a number, select it from the “Choose Number to Assign” dropdown.
- If you want to buy a new number, click “Purchase a Number.”
-
Buy a New Number (if needed)
- Choose the location and capabilities you want (e.g., SMS, voice).
- Select a number from the available list.
- On the next page, set the number settings:
- The selected user will be assigned to this number by default.
- You can add more users if needed.
- Set the number owner (defaults to the admin buying the number, but can be changed).
-
Complete Purchase
- Click "Buy Number" at the top. Credits will be deducted, and the number will now appear in the list of assignable numbers.
-
Assign the Number
- Whether it’s a newly purchased or existing number, select it in the "Choose Number to Assign" input box.
-
Save & Continue
- Click "Save & Continue" to complete the process. The user now has dialer access and can start calling via PrimeRole.
Removing Dialer Access
If you want to revoke dialer access from a user, follow these steps:
-
Go to Settings → Dialer & AI
- Locate the user in the Dialer Access list.
-
Click the Trash Icon
- This opens a confirmation modal.
-
Handle Number Ownership (if applicable)
- If the user is the owner of one or more numbers, you must reassign those numbers first:
- Option 1: Assign all numbers to a single user.
- Option 2: Assign each number individually to different users.
- If the user is the owner of one or more numbers, you must reassign those numbers first:
-
Assign & Continue
- After reassigning numbers, click “Assign & Continue.”
-
Finalize Removal
- The user’s dialer access will be removed and they will no longer be able to use the PrimeRole dialer.
Buying Numbers
PrimeRole lets you purchase and manage phone numbers that your team can use through the dialer. Below is how you can buy new numbers.
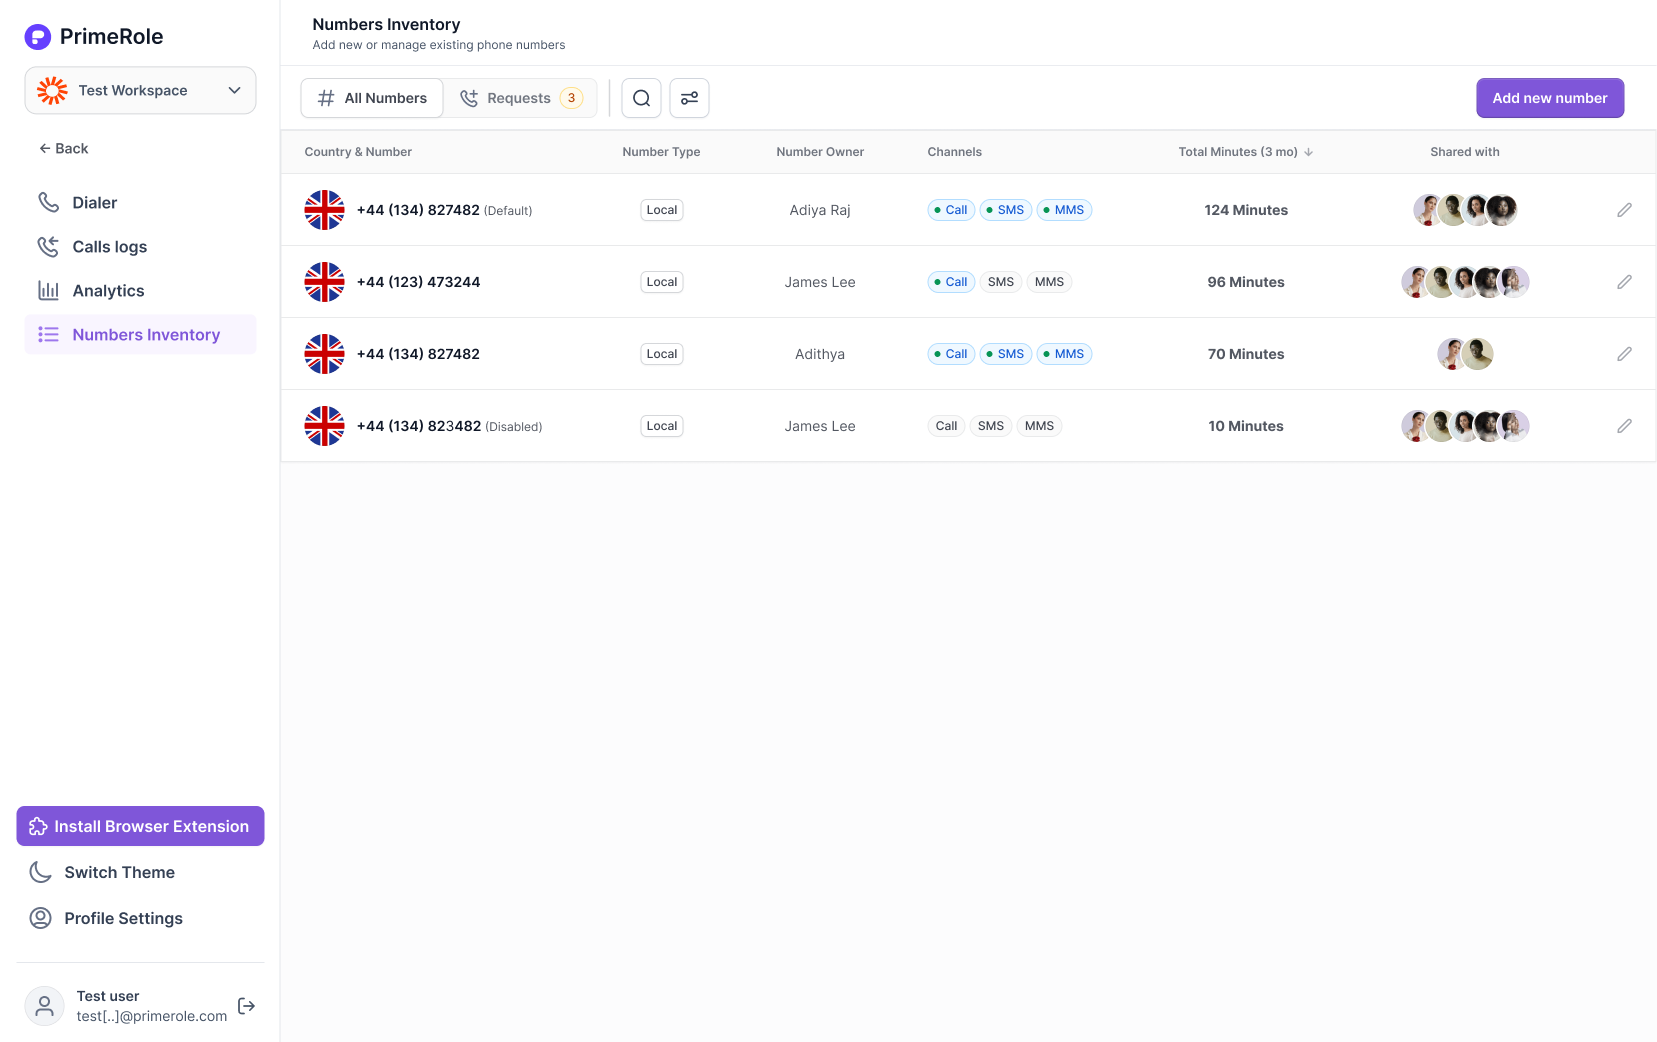
- Go to Numbers Inventory
- Admins will see all numbers in the workspace.
- Regular users will only see numbers they own or that are shared with them.
-
Click “Add New Number
-
Choose Location & Capabilities
- Select the country/region you want the number from.
- Pick the desired capabilities (e.g., voice, SMS, or both).

-
Select a Number
- Browse the available list and choose the number you want.”
-
Set Number Details On the checkout page:
- Assign Users (Number Sharing): Choose who can use this number.
- Set Number Owner: Defaults to the admin buying the number (can be changed).
- Add a Label (Optional): Add a name or tag for easy recognition.
-
Buy the Number
- Click "Buy Number" to complete the purchase. Credits will be deducted accordingly.
Assigning Existing Numbers
You can assign a number you already own to others in the workspace. You will need be a number owner or have admin privileges to share numbers.
-
Go to Numbers Inventory
-
Select the Number to Assign
- This opens the individual number’s settings page.
-
Update Number Settings
- Set Number Sharing:
- Share with specific users
- Share with the entire workspace
- Or keep it private to the owner
- Set Number Sharing:
-
Set Call Forwarding (Optional)
- If needed, configure call forwarding settings for this number.”
-
Save Changes
- Click "Save" to apply the updates. These settings are also available during the number purchase flow.
Requesting a Number (Regular User)
If you’re a user without admin privileges and need a new number for calling, you can send a request to the admin directly from PrimeRole.
-
Go to Numbers Inventory
-
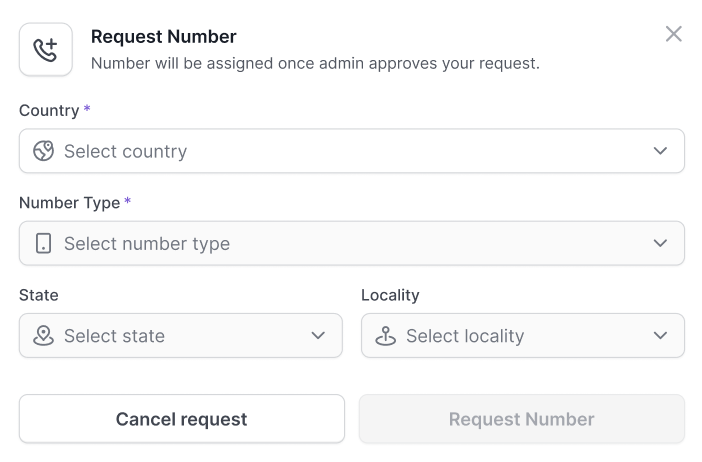
Click “Request Number
- A modal will appear where you can enter your requirements — such as location or capabilities (voice, SMS, etc.).
- Submit the Request
- Your request will be sent to the admin. You can track the status of your request in the “Requests” section.
Approving Requests (Admin)
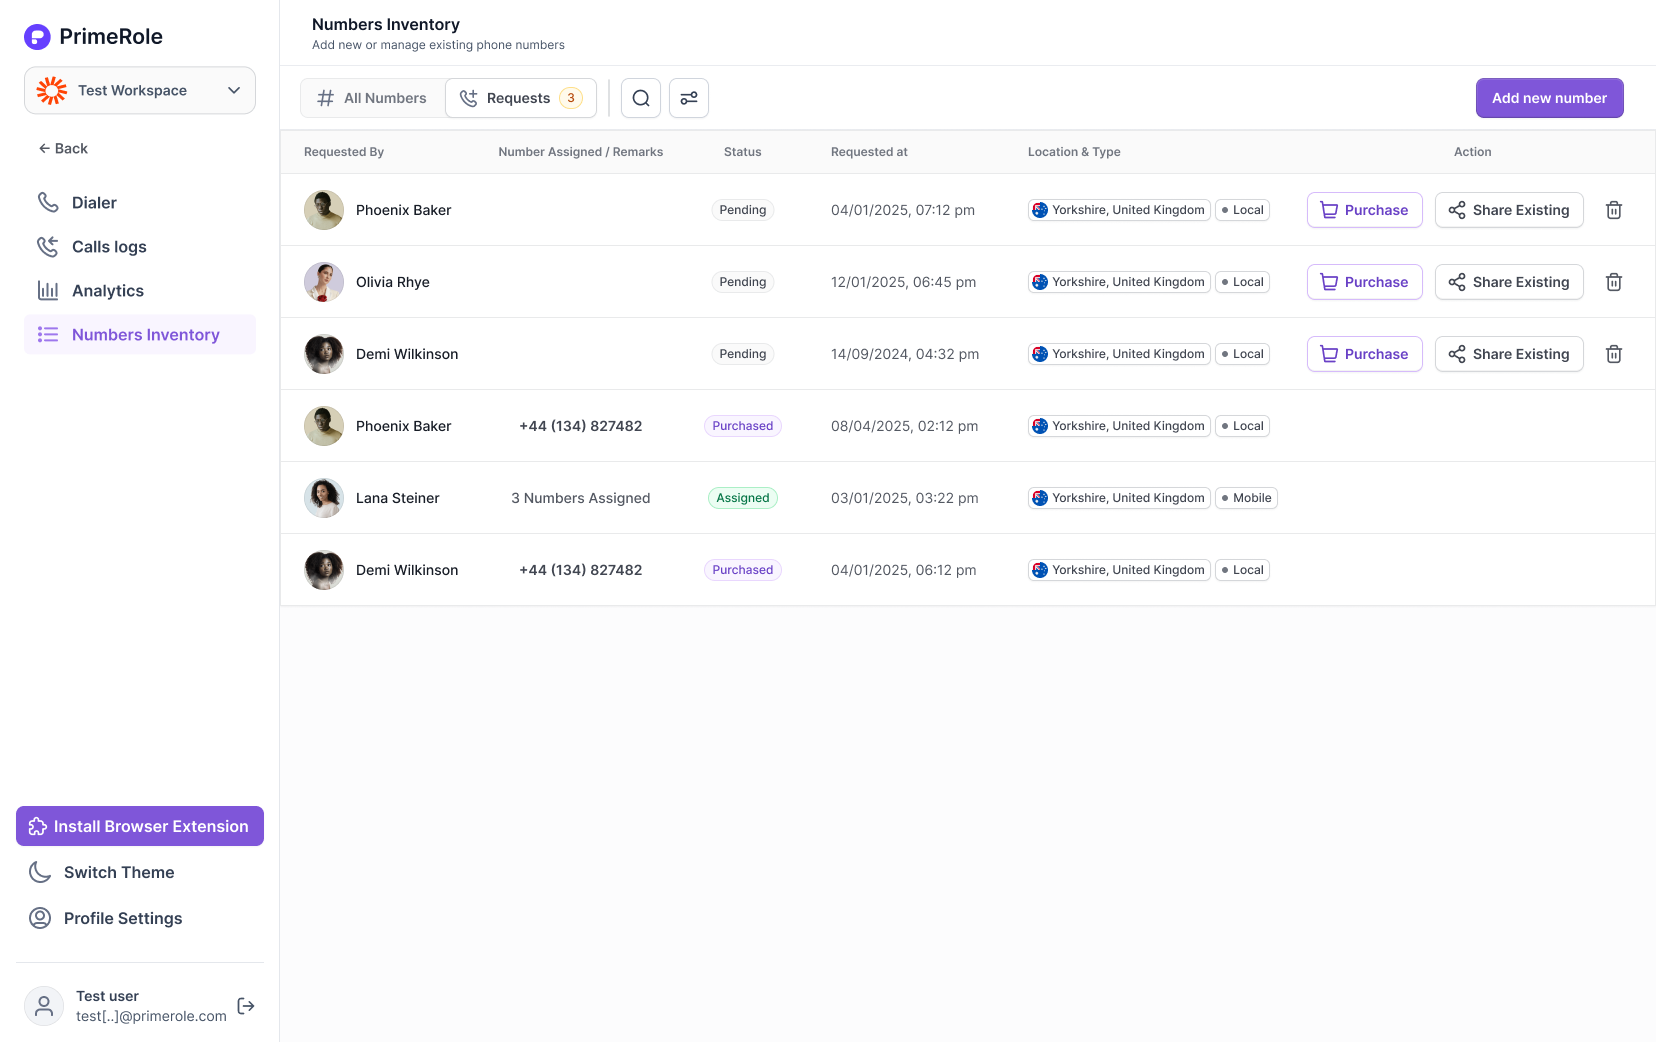
Admins will see all incoming number requests in the “Requests” section, where they can take one of three actions:
-
Purchase a New Number
- The admin is redirected to the Buy Number flow.
- They choose the location and capabilities of the number.
- At checkout, they configure:
- Number Sharing (who can use it)
- Number Label (optional tag for easy recognition)
- Number Owner (default is admin, but can be changed)
- The requesting user is automatically added to the assigned users list.
-
Assign an Existing Number
- The admin sees a list of available numbers in the requested location.
- They can change the location if needed.
- They select a number and assign it to the requesting user.
- The number is shared with the user, and the outcome is shown in their Requests section.
-
Reject the Request
-
The admin can choose to reject the request.
-
The user will see the rejection status in their Requests page.
-